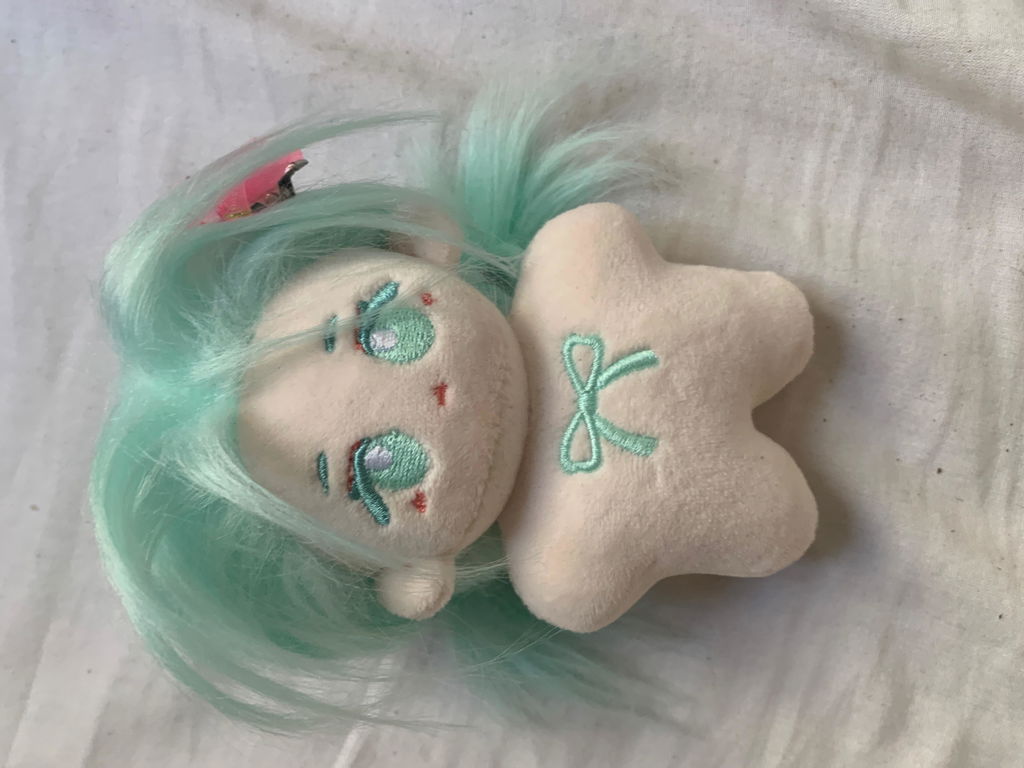
Have you ever dressed your beloved 10cm, 15cm, or 20cm cotton doll in a gorgeous handcrafted outfit, only to watch it slump over on your desk or flop backward during an outdoor photoshoot? While standard cotton plushies are adorably soft and squishy, their lack of an internal structure makes dynamic posing, holding miniature props, and standing unsupported virtually impossible.
The solution loved by customizers and doll crafters worldwide is the movable doll skeleton (often called a plastic ball-and-socket armature or "doll bones"). Installing an internal skeleton gives your plush doll realistic joint articulation—enabling its arms, legs, and neck to bend, sit cross-legged, hold poseable angles, and stay in place without clumsy acrylic doll stands.
In this comprehensive guide, we will walk you through everything you need to know about choosing the right armature size, preparing your tools, and executing a flawless, invisible "plushie surgery" at home using the 2PCs Movable Skeleton Figure Frame from niannyyhouse.

What is a Plush Doll Skeleton Armature?
Unlike metal wire armatures (which can fatigue, snap after repeated bending, rust during damp cleaning, or puncture delicate plush fabrics), modern doll skeletons are engineered from POM engineering plastic. This high-density, low-friction thermoplastic creates an interconnected ball-and-socket chain resembling a human skeleton.
Key advantages of POM plastic doll skeletons include:
- Silent Joint Articulation: High-grade joints rotate smoothly without annoying clicks, crunching noises, or stiffness.
- Lightweight & Durable: Weighing only a few grams, the frame does not add heavy, sagging weight to small 10cm or 15cm mascot dolls.
- 100% Rust-Proof & Safe: Non-metallic construction means you never have to worry about oxidation staining your doll's fabric or base layers during light spot-cleaning.
Selecting the Perfect Size: 10cm vs. 15cm vs. 20cm
Selecting the exact frame scale is crucial. A skeleton that is too large will strain seam stitching and feel rigid under the fabric, while an undersized frame will float loosely inside the plush padding without transmitting joint movement to the limbs.
| Size Tier | Target Plush Height | Compatible Doll Types | Key Movement Features |
|---|---|---|---|
| 10cm Frame | 9cm – 12cm | Pocket mascot dolls, mini idol plushies, palm-sized plush keychains | Compact limbs, subtle arm bend, steady seated posture |
| 15cm Frame | 14cm – 16cm | Mid-size cotton dolls, chubby fat body (胖胖体) plushies | Balanced torso-to-limb proportion, excellent sitting stability |
| 20cm Frame | 18cm – 22cm | Standard K-pop idol cotton dolls, anime plush, fashion dolls | Full multi-point articulation, high posing range, standing balance |
Understanding Type A vs. Type B Variants
When selecting your Movable Skeleton Figure Frame at niannyyhouse, each size offers Type A and Type B options:
- Type A (Flexible Articulation): Built with slightly smaller diameter ball joints, offering effortless, lightweight flexibility. Best suited for soft-sculpted dolls, plushies wearing thick layered costumes (like heavy knit sweaters or hooded cloaks), and crafters who prioritize smooth, casual posing.
- Type B (Reinforced Support & Firmer Damping): Features reinforced torso/spine linkages and tighter socket tension. Type B provides stronger load-bearing stability, making it the ideal choice for dolls that carry miniature handheld props or for owners seeking self-standing balance when paired with hard-sole boots.

Tools & Materials Checklist Before You Begin
Before beginning your installation, gather these essential crafting supplies on a clean, well-lit desk:
- 1 × Pair of Movable Skeleton Frames: We recommend having the niannyyhouse 2PCs Movable Skeleton Pack on hand so you can upgrade two dolls or keep a spare unit for testing.
- Seam Ripper or Fine Embroidery Scissors: Needed to delicately snip factory closure threads without damaging doll fabric.
- Extra Polyester Fiberfill (PP Cotton): Inserting the skeleton displaces some original stuffing; having fresh fiberfill allows you to evenly redistribute padding around the joints.
- Long Tweezers or Stuffing Stick: Helpful for guiding the skeleton's hands and feet into the outermost tips of the doll's plush limbs.
- Sewing Needle & Matching Thread: Choose heavy-duty polyester thread matching your doll's back skin or hair fabric tone.
- Sewing Clips or Tailor's Chalk (Optional): Useful for marking your planned incision point.
Step-by-Step Installation: How to Put a Skeleton in a Plush Doll
Step 1: Locate the Factory Closing Seam
Nearly every manufactured plush doll has a hand-stitched closing seam created during final stuffing at the factory. This seam is almost always located vertically down the center of the doll's upper back, just below the neckline between the shoulder blades. Feel with your fingers along the back: you will notice a section where the stitches are slightly less uniform than the surrounding machine-sewn seams.
Step 2: Carefully Open a 3–4 cm Incision
Using your seam ripper, gently snip 4 to 6 ladder stitches along the back seam. Gently tease the seam open until you have an aperture approximately 3 to 4 centimeters wide. Avoid cutting the plush fabric backing itself; only cut the closing threads.
Step 3: Extract Core Torso Stuffing
Use your fingers or tweezers to pull out approximately 40% to 50% of the fiberfill from the body cavity. Important Pro Tip: Do not remove stuffing from the doll's cheeks or chin! Keeping the face firmly stuffed ensures your doll's facial embroidery, round cheeks, and expression remain pristine and wrinkle-free throughout the modification.
Step 4: Test-Fit the Skeleton Frame
Hold the plastic skeleton against the outside of the doll's back to visually confirm that the shoulder width, arm length, and leg joints align with the doll's physical dimensions. The plastic hand and foot ends should stop about 0.5 cm short of the fabric tips, leaving room for a protective cushion of cotton.

Step 5: Insert the Skeleton Frame (Legs First)
Guide the skeleton into the body opening using the following order:
- Slide the lower spine and both legs downward into the doll's thighs and feet. Use your stuffing stick or fingers to push the rounded plastic ends into the corners of the plush feet.
- Fold the skeleton's arms inward against its chest and slide the neck joint up into the lower head cavity. This neck anchor provides crucial head-tilt support.
- Gently bend each arm outward and guide the plastic arm links down the fabric sleeves into the doll's plush hands.
Step 6: Cushion and Restuff Around the Frame
Never leave bare plastic resting directly against the doll's outer skin. Wrap small tufts of fresh polyester fiberfill around each joint before packing. First, pack cotton around the hands and feet to form soft, natural tips. Next, fill the front chest and tummy area so the doll retains its signature chubby, huggable silhouette. Finally, add light padding over the back of the spine so the plastic armature cannot be felt from the outside.
Step 7: Close the Seam with an Invisible Ladder Stitch
Thread your hand-sewing needle with double-stranded matching thread. Fold the raw fabric edges inward along the original seam allowance. Work an invisible ladder stitch (blind stitch) back and forth across the opening: take a 2mm horizontal bite on the left side, then a 2mm horizontal bite on the right side. Continue down the entire opening. When you gently pull the thread taut, the stitches will sink invisibly between the plush fibers. Finish with a hidden knot and snip the excess thread.
Safety & Crafting Notice: Movable skeleton frames contain small modular ball-and-socket components. While securely sealed inside a plush doll, uninstalled parts present a choking hazard for young children. This DIY upgrade is recommended for adult collectors, teens, and crafters aged 14+. All purchases from niannyyhouse include free standard shipping worldwide and a 14-day satisfaction return policy.
Pro Tips for Posing and Caring for Articulated Plush Dolls
1. Pair with Flat-Bottom Shoes for Free-Standing Balance
While an internal skeleton gives your doll rigid leg and hip support, plush doll feet are naturally rounded. To achieve effortless, freestanding balance without acrylic clips, pair your newly poseable doll with hard-soled boots or platform sneakers from our 10cm doll accessories & shoes collection. The firm sole provides a stable base of support that works in harmony with the skeleton's leg damping.
2. Never Force Joints Beyond Their Range of Motion
POM plastic ball joints are exceptionally sturdy under tension and compression, but excessive twisting beyond 90 degrees can pop a link out of its socket. Always pose your doll by gently feeling the joint with your thumbs rather than yanking the fabric from the outside.
3. Safe Spot-Cleaning & Water Resistance
Because the niannyyhouse Movable Skeleton Frame is made entirely of non-corrosive plastic with zero internal metal springs, moisture from routine sponge cleaning or gentle hand-washing will not cause internal rust stains. Ensure the doll is thoroughly air-dried in a warm, ventilated space to keep the interior fiberfill fresh.
Frequently Asked Questions (FAQ)
Q1: Can I install a skeleton in a plush doll that has an embroidery patch or sound box?
Yes. Simply guide the armature around the sound unit or wire harness. Most 15cm and 20cm dolls have generous torso cavities that easily accommodate both a central frame and electronic or weighted beads.
Q2: What is the main difference between Type A and Type B skeletons?
Type A utilizes slightly slimmer ball joints designed for effortless, fluid posing—ideal for lightweight outfits and soft mascot plushies. Type B features reinforced torso linkages and firmer socket tension, engineered for standing stability and holding heavier props.
Q3: Can the length of the skeleton arms or legs be adjusted?
Yes! Because the armature is composed of interlocking ball-and-socket segments, you can pop off or add individual links using a pair of ball-joint pliers to customize the exact limb length for unique doll proportions.
Q4: Will adding a skeleton damage the doll's fabric over time?
No, provided that you adequately pad the joints with fiberfill during Step 6. The smooth, rounded contours of POM plastic contain no sharp burrs, protecting both plush knits and delicate clothing.
Q5: How many skeleton frames come in each pack?
The niannyyhouse Movable Skeleton Set includes two (2) complete movable skeleton frames per pack, allowing you to customize two dolls or share with a fellow crafter.